Territories Based on Groups
Scan/US has a powerful grouping tool to create groups.
Now you can use groups to make a permanent polygon layer based on a group of objects on another layer.
For example, you may have created groups of ZIP codes that make up a franchise territory, or groups of Census Tracts that represent Parishes or school zones. Now you turn these groups into individual polygons on a new layer.
Because membership in a group is either/or, the type of territories produced by this technique are non-overlapping.
Note: this feature will work with groupings based on Census block groups, Census tracts, ZIP codes, counties, county subdivisions, or MSAs.
Example map: Three areas based on groups of counties
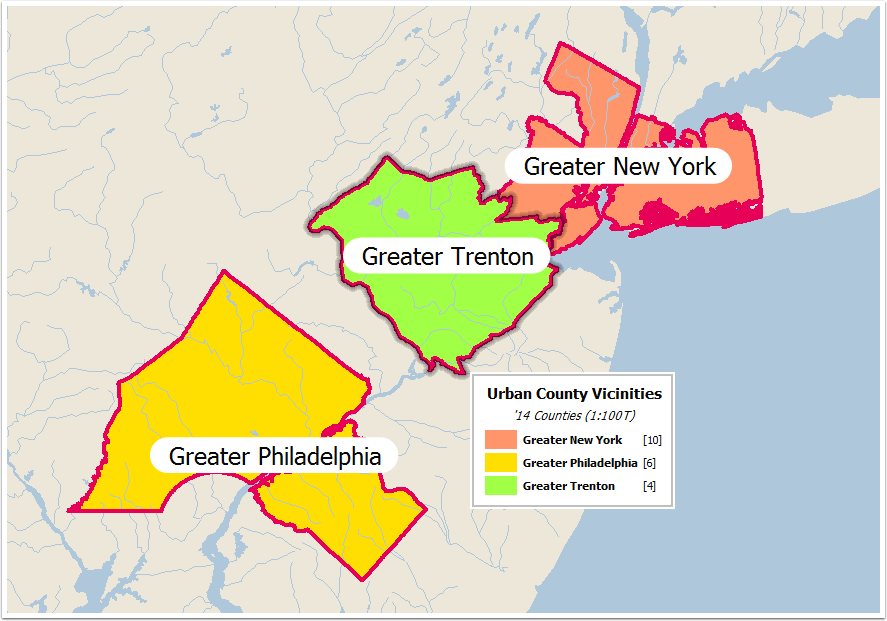
Example map of three areas based on three groups of counties.
The three areas shown above are based on groups of counties. Each area has its own label and external border. The interior colors shown here are those of the three groups of counties on the county layer below.
Other Examples
You also could assemble trade areas based on groups of Census tracts or Census block groups, and create a new polygon layer in that way. In these cases, the data on the new layer would come from the Census tract or Census block group data.
We will show a step-by-step example of a territory based on ZIP codes.
Example territory based on two ZIP code groups
Since the new layer's names are not editable, YOU MUST make sure your group and grouping names are the names you want BEFORE you click OK to create the new layer.
- Make your grouping name match the name of your desired new layer.
- Make your group names match your desired new objects
- Choose "Create group layer..." from the Scan/US Groups menu.
The new layer’s name may be changed like any other layer, but the object names match the original group name. If you want to change them after the layer has been created, simply delete the new layer and start over after changing the group name.
This example shows the creation of a new layer based on ZIP codes. We rename the ZIP group and grouping as in steps 1 to 3. Then we put on labels and a new border, just as in the counties map above.
Start with a grouping
The starting map below shows a grouping of ZIP codes with the name "Zones by Household Size". Each group is named according to a numbered range of household size. We will change the grouping name to "Household size territories". We will give the groups new names too: "Large, medium and small".
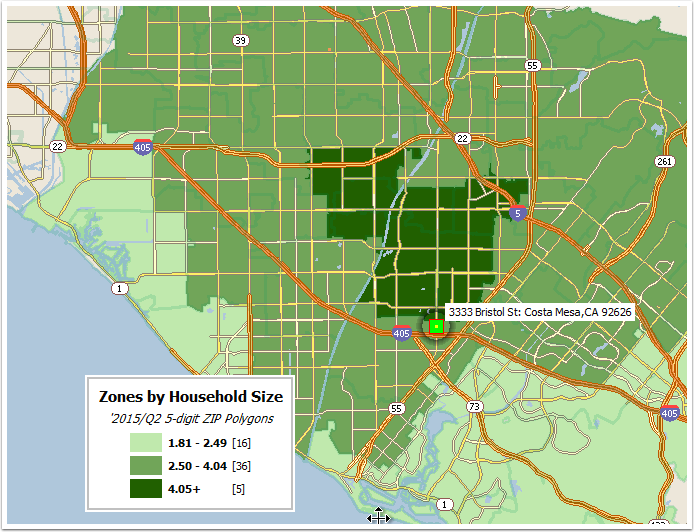
Grouping of ZIP codes with the name "Zones by Household Size". Each group is named according to a numbered range of household size
The new layer will take the name of the grouping.
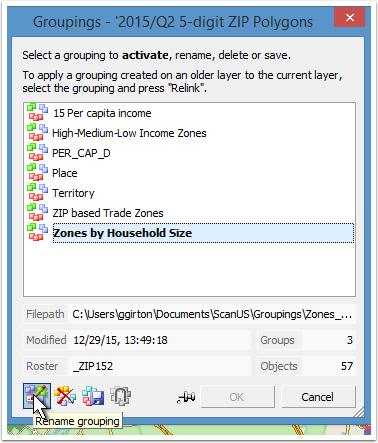
The current grouping name is "Zones by Household Size." Let's change the grouping name to "Large and Small Household Areas". The "Rename grouping" button located at the bottom left of the Groupings dialog lets you do this. It's a picture of a groups icon, with the image of a pencil on it.
- Note: you can also give your new layer a name when you choose 'create group layer', but then it will have a different name from the grouping.
Rename Grouping for the new layer
Rename the groups in the Group manager.
Each group becomes an object on the new layer. You want your object names to be comprehensible.
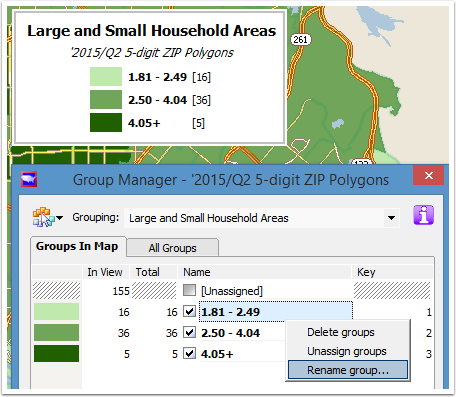
Open the Group Manager dialog from the Groups menu, and rename the groups. Each object on the layer will be named after a group.
We will call them "small", "medium", and "large", which will become the name of each of the three objects.
Rename the group by selecting the group name in the list, and right-clicking to get the context menu in order to choose "Rename group..." .
Rename Groups for the new objects
Now the legend of groups and groupings looks like this:
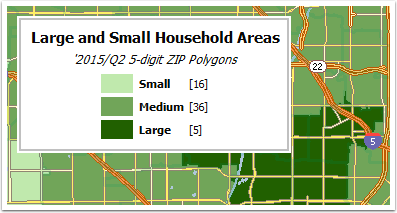
Ready to create the new grouping-based layer!
Each group is composed of ZIP codes (the count shown in parentheses next to the group name).
Create the new layer
In this step we make the group-based territories: choose "Create group layer ..." from the Groups menu.
Notice the highlighted name "Areas based on Average household size". You can rename the new layer here, as well. Just don't forget to press "enter" before clicking OK, to make the name stick.
The bottom of the dialog has three choices for where you want the new layer to be stored:
- Wherever the grouping file is stored
- in an existing project folder
- in a new project folder
It doesn't make any difference to our purpose here which one to choose.
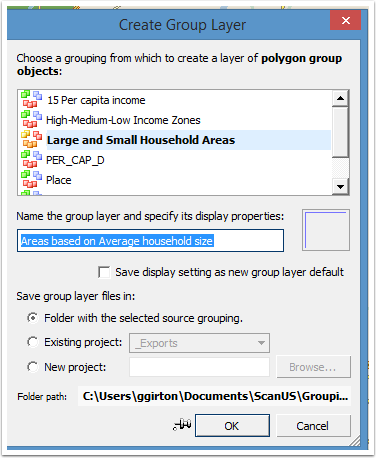
Create group layer
Click OK, and ...
Your new layer has been created.
Your new objects on the new layer match the groups on the source layer.
The border of each new object is displayed around the group from the ZIP layer.
Groups don't need to be contiguous, and the new objects might not wind up next to each other either.
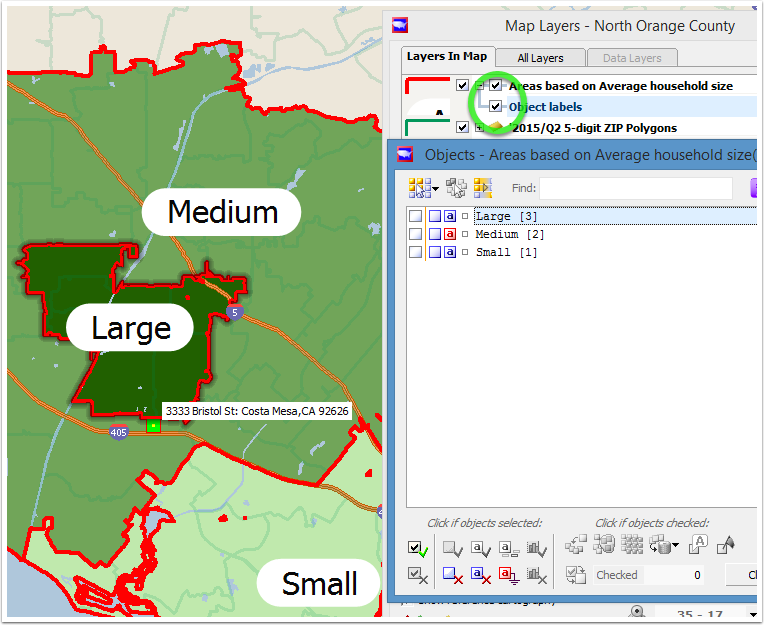
Resulting new layer based on ZIP groups
The label of each new object is placed at the center of the object. You can use "select label mode" to move the label as necessary.
You can turn the labels on with the "Object labels" line in the Map Layers Dialog (green circle shown above).
The new layer is "permanent". In other words, its borders and object labels are immune to editing. Think of this as an advantage.
Labels, and whether an object is hidden, can be controlled from the Object Manager (dialog titled "Objects" shown above right).
Your new group layer comes with built-in data.
Now you have a fully first-class layer, complete with its own labels, and control over object appearance (fill and border). What about data for the new objects?
Because group layers are not editable, you may want to carefully plan your source grouping's keys and names.
For example, if your company's other databases make use of territory codes, then you should make sure that each of your groups' keys also uses that same key so that the resulting group objects layer can be used to link territory data.
If you don't have company data to match to these territories, no worries. You can use the built-in Scan/US demographic data with no further preparation. In typical Scan/US fashion, the Scan/US demographic data is brought in to the new layer automatically.
When it comes to the built-in Scan/US demographic data, you can examine it using Quicklook (shown below), export it using Export data (Data menu), and do anything else related to data such as Classify by Value.
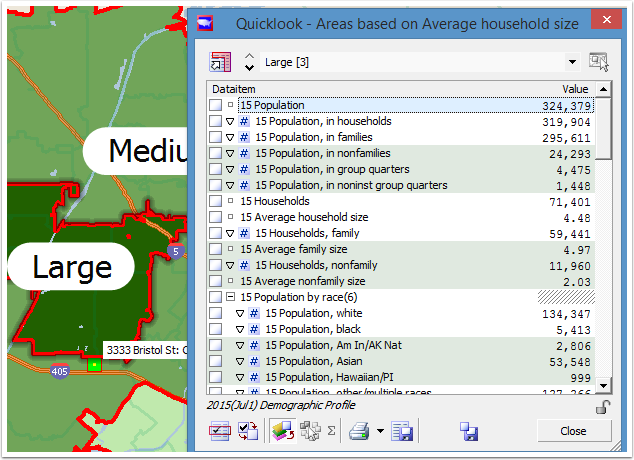
Looking at data for the 'Large' territory
Finding your new layer and putting it in a new map.
Your new layer is wonderful. When you make a new map, how do you find it again?
When you open the Map Layers dialog from the Map menu, and navigate to the "All Layers" tab, you can find your new group layer by clicking the "plus" next to the Group Layers entry. (Map Layers dialog shown below)

Changing the border style to a thicker blue border
Here we have made the layer blue, by clicking the button (shown above with a blue line on it) to the left of the checkbox and changing the area style.
Notice that it does not have the green background from the prior map. Why is this? This is because that green coloring came from the grouped ZIPs in the background, not from the new layer itself.
Deleting the layer
You are done with your project, and you want to get rid of your new layer completely.
One again, navigate to the "All Layers" tab of the Map Layers dialog, click the plus next to "Group Layers" to show them, click on the layer you wish to eliminate, and right click for the context menu. Choose "Remove from system".
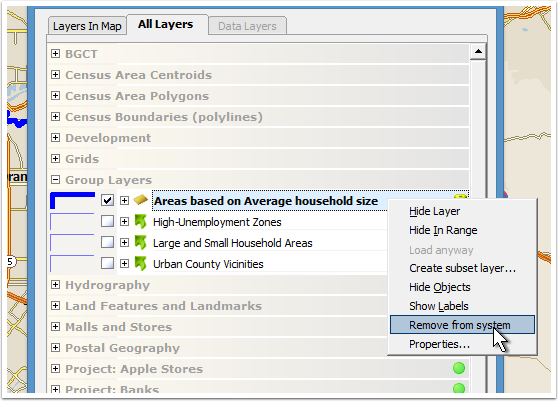
"Remove from system"
If you decide to delete, this dialog is your final warning.
It will be gone after this. If you want it again, you will have to re-create it. That's all, folks!

The layer will be gone.
Summary
A new layer can be created by choosing "Create group layer" from the Groups menu.
The grouping has to exist. Groups don't need to be next to each other.
The process:
- Make your grouping name match the desired name for your new layer.
- Make your group names match the desired names for the new objects
- Choose "Create group layer..." from the Scan/US Groups menu.
New layer polygon names are not editable. Make sure your group names match the desired names for the new objects BEFORE you click OK to create the new layer. Otherwise, you will have to delete the new layer and start over.
This feature works with groups based on:
- Census Block Groups
- Census Tracts
- ZIP codes
- Counties
- County subdivisions
- MSAs
The type of territories created are non-overlapping.
New layers have data based on the grouped objects from their source layer.